Postman
We recommend downloading, installing, and using Postman to test API requests and verify responses.
Set up Postman using OpenID Connect
Before you start
To use the different grant types (Implicit, Authorization code (With PKCE)) with your requests in Postman, you need to grant access to a multi-tenant app in Azure AD to use CDF with Postman. To grant access, you must be an Azure AD tenant administrator.
Follow the steps in How to register Cognite API to register the app. When you have registered the app, you can sign in with your Azure AD credentials.
Before you set up authorization in Postman, set up your Azure Active Directory:
-
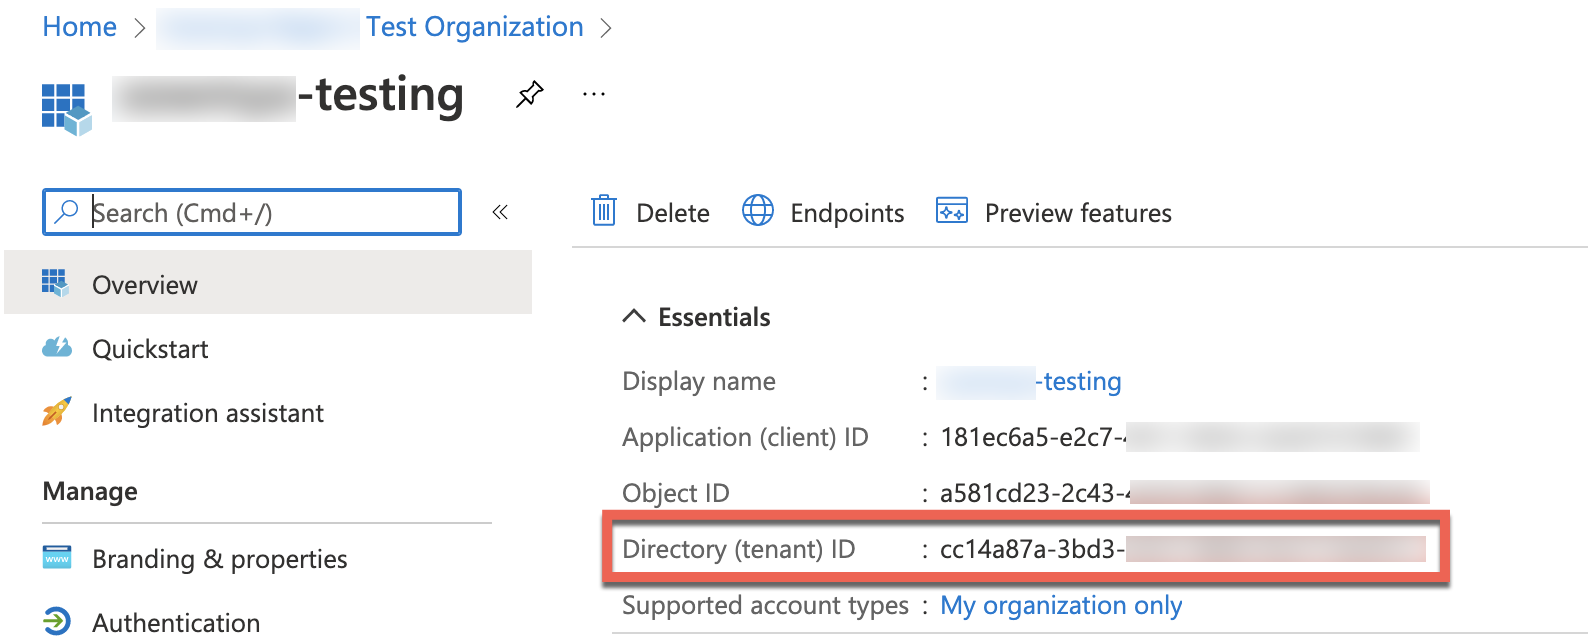
Go to Azure Active Directory, you'll find your Tenant ID and Application (client) ID in the overview page.
-
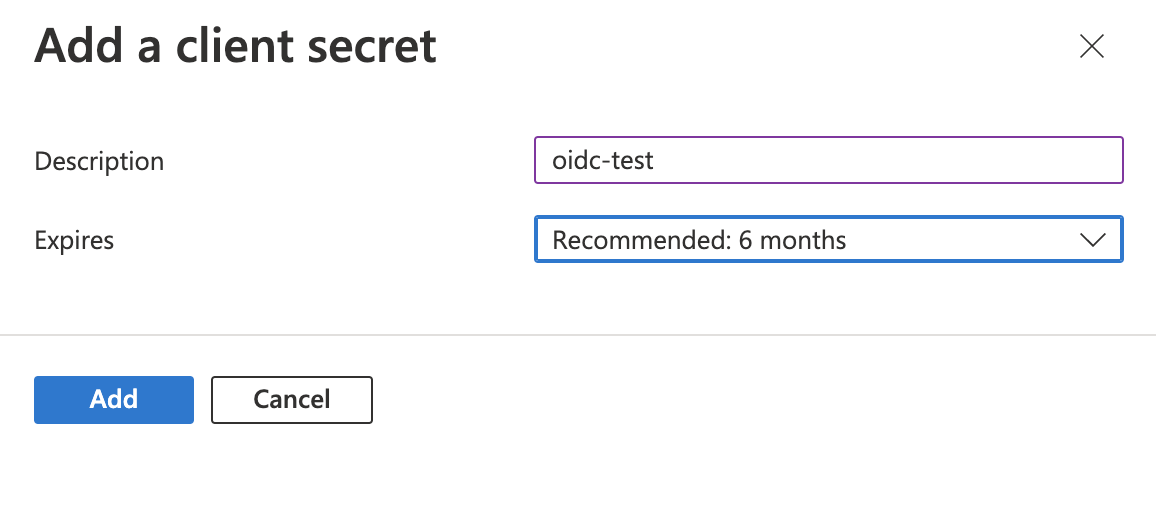
In the App registrations section, create a New client secret under Certificates & secrets in the left menu. Select + New client secret, enter a description, an expiry period, and select Add.
-
You must add the Redirect URL in your Azure AD application.
Step 1: Import your Postman collection
Download the Cognite OpenAPI specification.
-
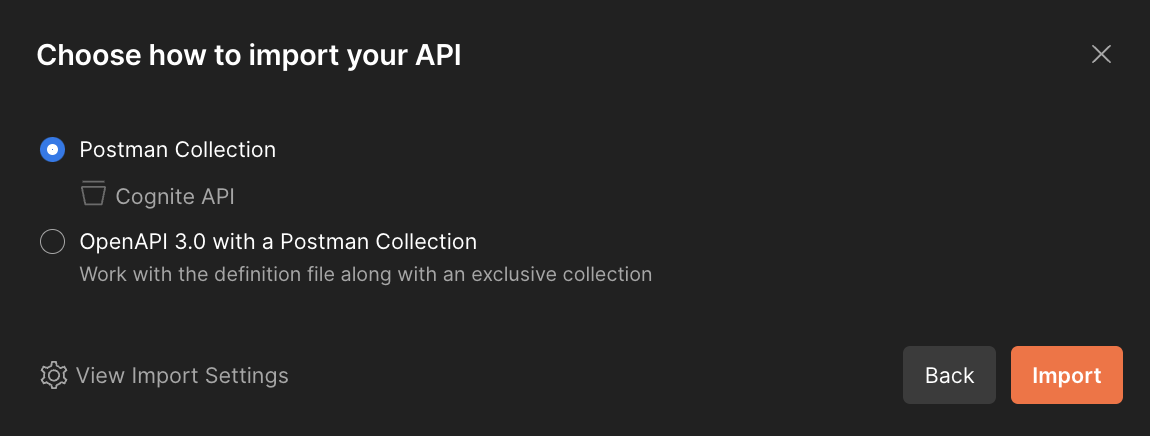
In Postman, select Import and drag the file to the import modal. In ** View Import Settings **, you can choose how to import your API and manage the import settings.
-
In the Import Settings, set the Folder organization to Tags, select Enable optional parameters to turn it off, and select Always inherit authentication to turn it on. Select Import to import this data.
-
Select Continue > Import to import the collection.
Step 2: Set up environment variables
-
To create a new environment, navigate to Environments on the left sidebar. Select + Create new Environment and give it a name.

-
Add the variables:
- tenant-id: This is your Directory (tenant) ID.
We recommend that you work with the current value of a variable to prevent sharing sensitive and confidential information with your team.
-
token: Use OAuth 2.0 to generate a new token. It will populate automatically, so you can leave it blank as an environment variable.
-
baseUrl: When you import the collection, the baseUrl is set to
https://{{cluster}}.cognitedata.com/api/v1/projects/{{project}}. cluster is where your CDF instance is installed. If you don't know the cluster name, contact Cognite support.
For Open Industrial Data, the cluster is api.
- project: This is your CDF project name.
Step 3: Update authorization
With OAuth 2.0, you retrieve an API access token and use it to authenticate future API requests.
To use OAuth 2.0:
- Navigate to the Authorization tab in the collection overview, select OAuth 2.0 as Type and Request Headers as Add authorization data to.
- To request an access token, fill out the fields in the Configure New Token section and select Get New Access Token.
- Input your client application and authorization details from the service provider to test the authenticated requests.
- Input the details depending on the OAuth 2.0 grant type you want to use - Implicit, Authorization Code (With PKCE), Authorization Code or Client credentials.
To understand how to register and configure the application and its authentication flows, see Configure applications and the authentication flows. The following section describes the authentication flow for each of the grant types:
Implicit
-
Select Configure New Token and specify these configuration options:
- Enter a Token Name.
- Select the Grant Type as Implicit.
- Input the Callback URL as
https://postman.cogniteapp.com/loggedin.
If you select the checkbox Authorise using browser, the Callback URL auto-populates. Otherwise, you can input the Callback URL. Once your application is authorized, you will be redirected to the Callback URL.
-
Enter the Auth URL as
https://login.microsoftonline.com/{{tenant-id}}/oauth2/v2.0/authorize. Replace the tenant-id. -
Input the Client ID as
https://postman.cogniteapp.com. -
The Scope is
https://{{cluster}}.cognitedata.com/+default,user_impersonation,DATA.VIEW, orIDENTITY.user_impersonationgrants all permissions to the user assigned to access the API. TheDATA.VIEWscope grants read-only access to data in CDF, for example, to view files, time series, RAW, and other CDF resources. To learn more about CDF's scopes, see the different Access token scopes.
When using a scope for the first time, the admin must define it explicitly and consent to use it for the authorization process.
-
Select Client Authentication as Send as Basic Auth header.
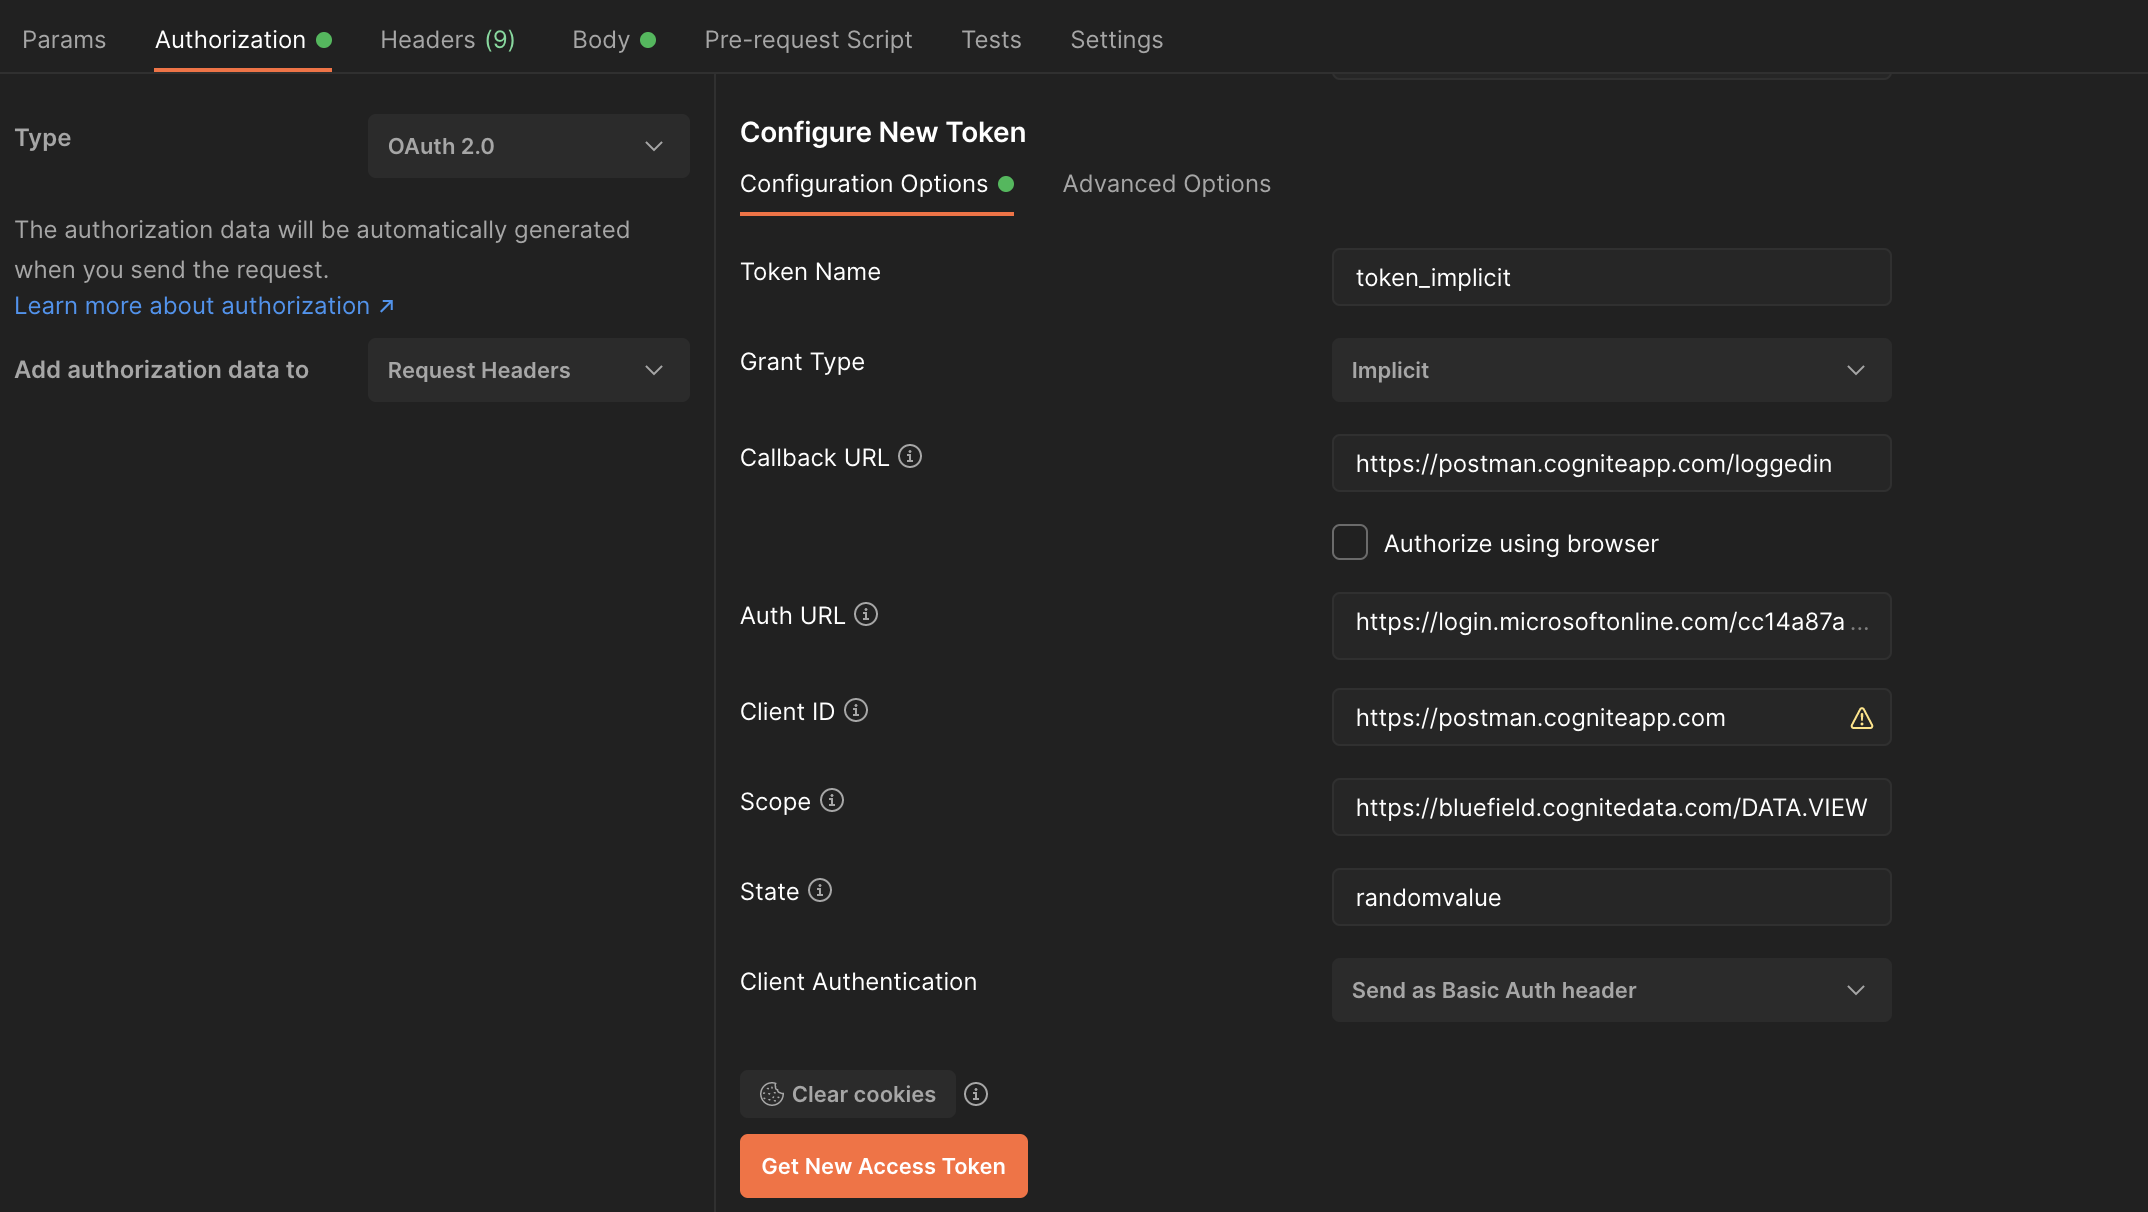
- Select Get New Access Token > Proceed > Use Token.
You have configured a new token using the Implicit grant type.
Authorization Code (With PKCE)
-
Select Configure New Token and specify the configuration options:
-
Enter a Token Name.
-
Select the Grant Type as Authorization Code (With PKCE).
-
Input the Callback URL as
https://oauth.pstmn.io/v1/callback. -
Enter the Auth URL as
https://login.microsoftonline.com/{{tenant-id}}/oauth2/v2.0/authorize. Replace the tenant-id. -
Enter the Access Token URL as
https://login.microsoftonline.com/{{tenant-id}}/oauth2/v2.0/token. Replace the tenant-id. -
Input the Client ID and Client Secret.
-
You can choose to use
SHA-256orPlainalgorithms to generate the Code Challenge Method. Code Verifier is an optional 43-128-character string that connects the authorization request to the token request. If left blank, the field is automatically generated. -
The Scope is
https://{{cluster}}.cognitedata.com/+default,user_impersonation,DATA.VIEW, orIDENTITY. -
Input a random value for State to prevent cross-site request forgery.
-
Select Client Authentication as Send as Basic Auth header.

-
-
Select Get New Access Token > Proceed > Use Token.
You have configured a new token using Authorization Code (With PKCE) grant type.
You are now ready to use Postman with OIDC as the authentication method.